It’s been a week since the New Year started and it is very remiss of me to not wish my readers a very happy and prosperous New Year!
With the start of the New Year, I would like to be more regular in posting about my yarny pursuits and decided that I needed a theme to help me get going.
I always state that crochet is my therapy ; it helps me to destress and gets me to focus. I would love to share my love for crochet with you all !
This year I would like to focus on Tunisian Crochet and bring you a stitch a week (every Saturday), and share some tips and tricks alongside. I will be creating short videos of the stitches and hopefully you will find that useful. Will update the blog ost as soon as that is ready.
TUNISIAN CROCHET
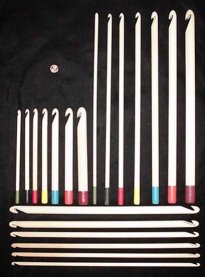
Tunisian Crochet is also called Afghan Stitch. It was called Afghan stitch as it was primarily used to make blankets or as it is known in North America as Afghans. They used to mostly make it in Tunisian Simple stitch which creates grid perfect to use cross stitch motifs. Earlier , Tunisian crochet gave very dense fabric and hence it was mainly used to create blankets or potholders. However , during the late 90’s and early 2000, Valerie and Monte , created beautiful wooden crochet hooks that were way bigger than the then available Tunisian crochet hooks. These hooks made working the Tunisian stitches a breeze and as the hooks were bigger the project grew in size quickly enabling one to finish their projects quickly! Sadly I cannot find these hooks for sale anymore and I am glad I pouched them when I could. Here is an image of the hooks I found online(I have to go looking for my hooks:))
The idea of using a bigger hook for Tunisian projects took hold in the crafters’ minds and then there was no stopping us! This also solved the problem of the stitches curling, producing a soft drapey fabric and allowing designers to come up with beautiful wearables in Tunisian Crochet.
I hope I have piqued your interest a little and convinced you to take a chance into giving Tunisian Crochet a try!
Let’s start this week off with Tunisian Simple Stitch.
I have decided that as there are several places you can learn the basics of Tunisian Crochet, I will share an idea with you which you can customize for your needs. We are going to be making a square using the Tunisian Simple Stitch (abbreviated from here on as TSS) and short row technique.
What are short rows? Well these are rows where you don’t work on all the stitches. You can either bind off stitches at the start of the row or leave the stitches at the end unworked!
For this square we will be working one quarter of a square at a time.
Turn a Square
Materials
Any weight yarn you have ready at hand , preferably worsted weight if you are trying this for the first time.
Hook size : two sizes bigger than what you would normally use for yarn selected. For example if you have taken worsted weight yarn , use 6.5mm or 7 mm hook. We can use regular crochet hook for this work as we are not going to be holding a lot of loops on the hook.
Stitches and Abbreviations
Ch – Chain
YO – yarn over
SC – Single Crochet
TSS – Tunisian Simple Stitch
Insert hook from right to left in the vertical bar, YO and pull up a loop
E St – Edge Stitch
(the last st in a row) is made as follows :- Insert hook, through two loops, YO and pull up a loop.
FP – Forward Pass
When you work TSS in each st of the row it is called forward pass
RP – Return Pass
YO pull through 1 loop, YO pull through 2 loops till you have just one loop is left on the hook.
BO – Bind Off
Instructions
Note: The loop on the hook is counted as first stitch.
First Quarter
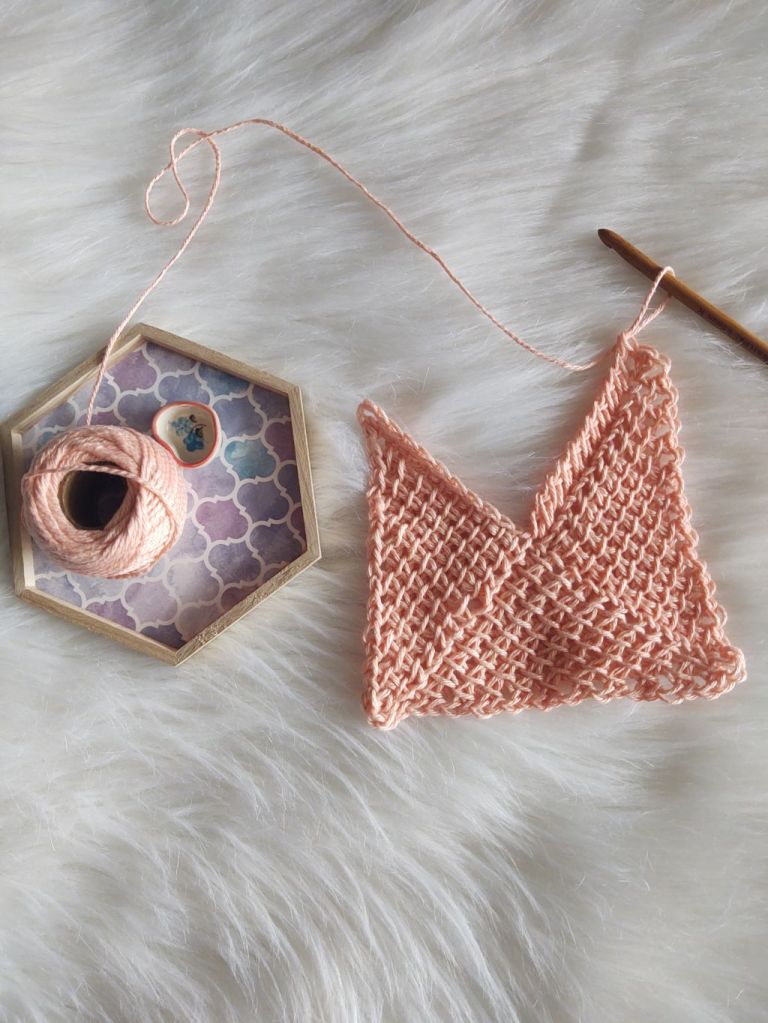
Row 1
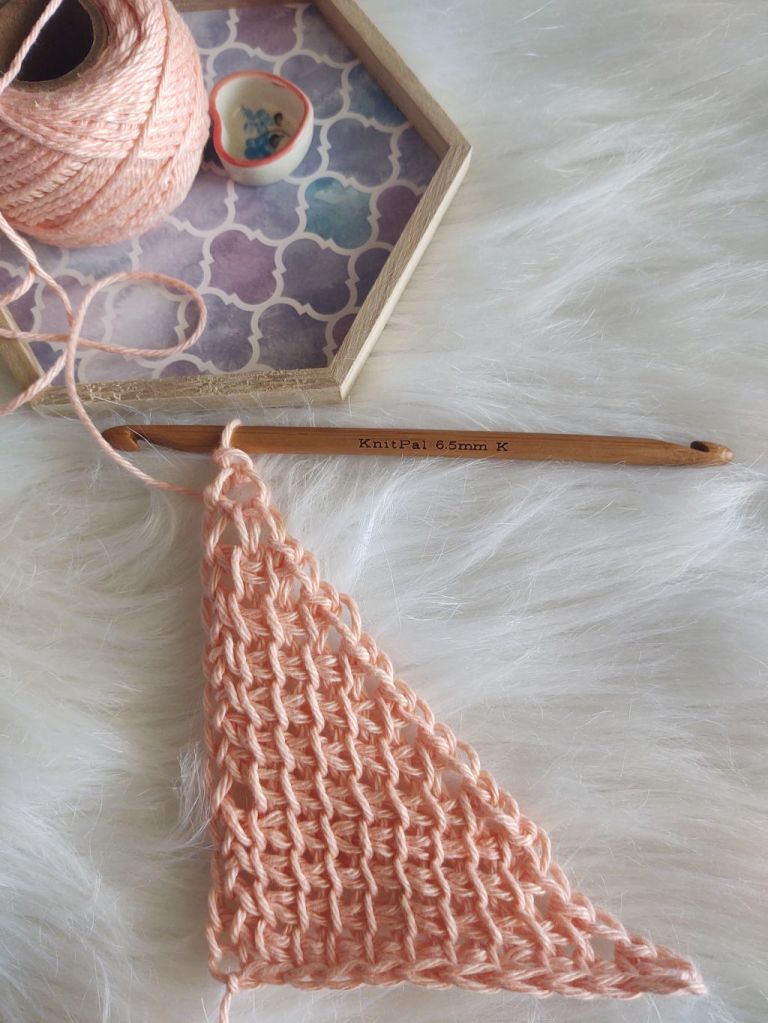
FP: Ch12 1TSS in the second chain from the hook, 1 TSS in each of the next 10 chains- 12loops on the hook.
Work RP – 12 TSS.
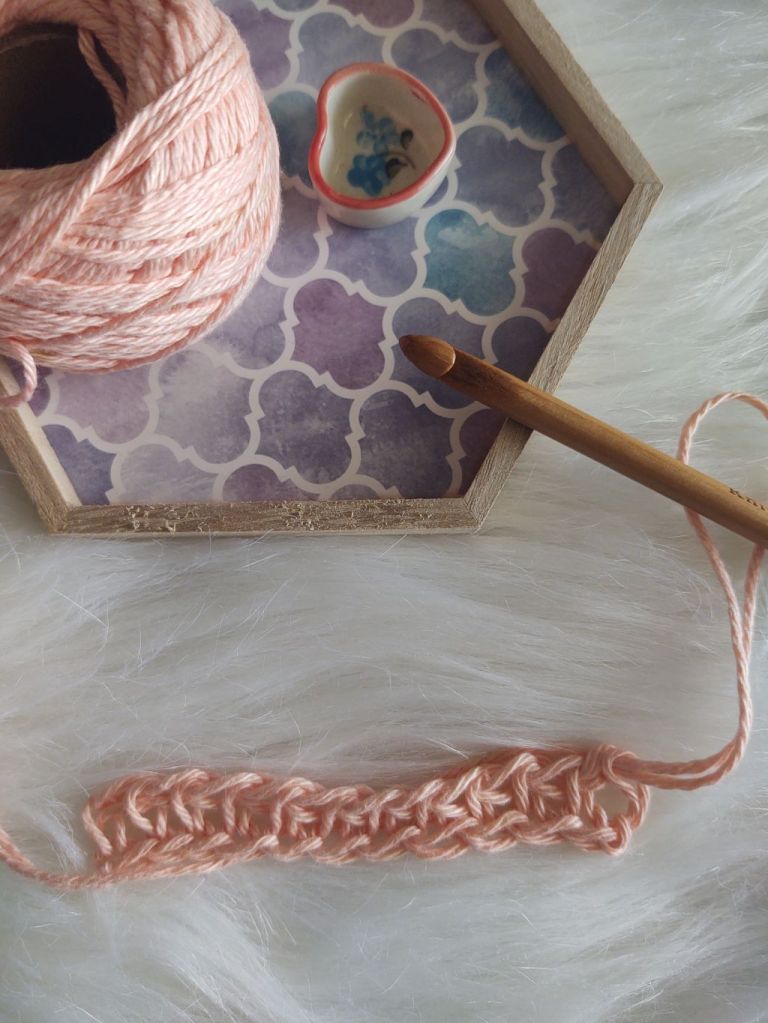
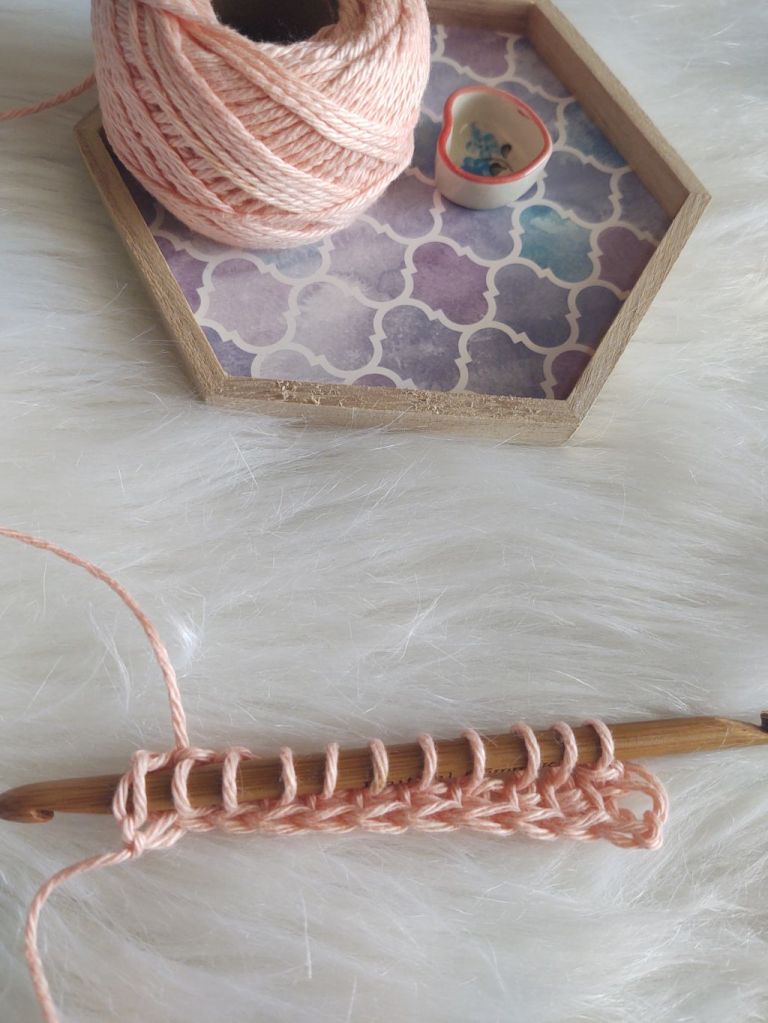
The above picture shows the Edge st.
Row 2
FP: Bind off 1 st as follows:- insert hook in the second vertical bar, yo, pull through the vertical bar and the loop on the hook, 1 TSS in each of the next 10 sts, 1 E st- 11 loops on hook.
Work RP – 11 TSS.
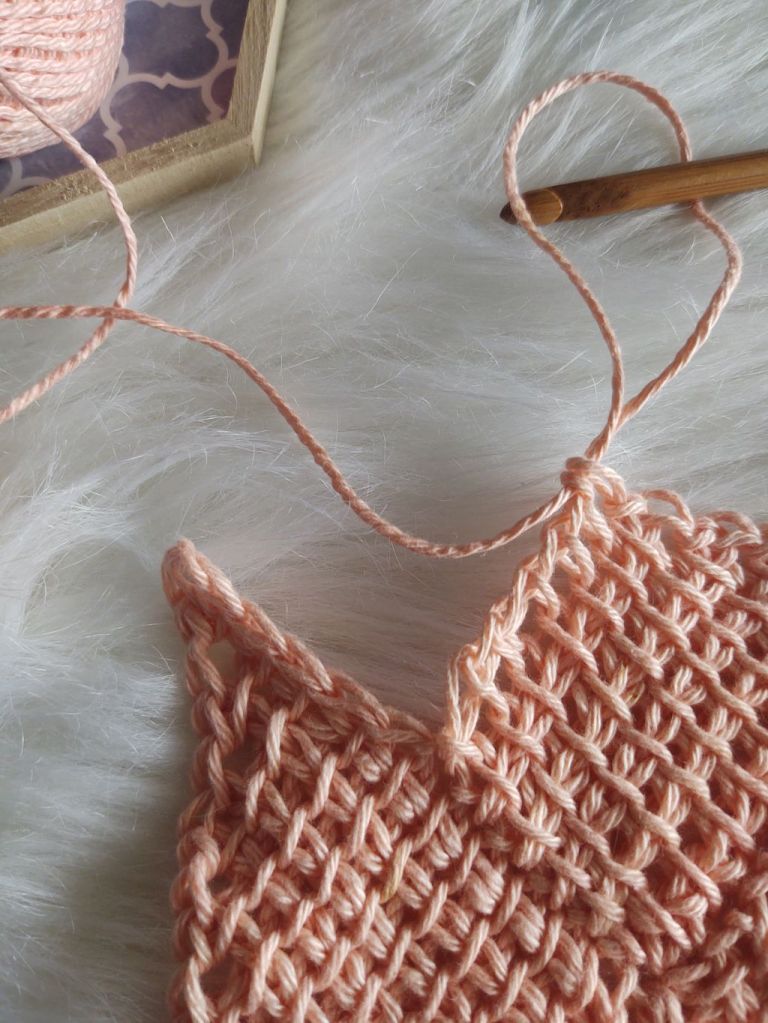
Row 3
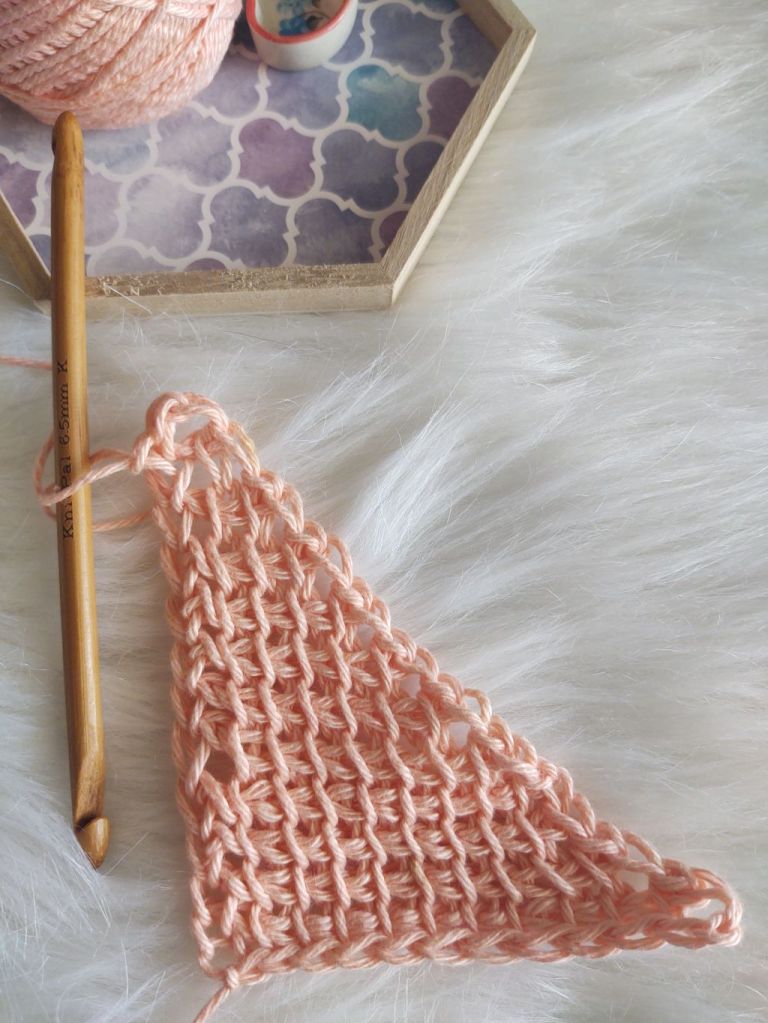
FP: Bind off 1 st as follows:- insert hook in the second vertical bar, yo, pull through the vertical bar and the loop on the hook, 1 TSS in each of the next 9 sts, 1 E st- 10 loops on hook.
Work RP – 10 TSS.
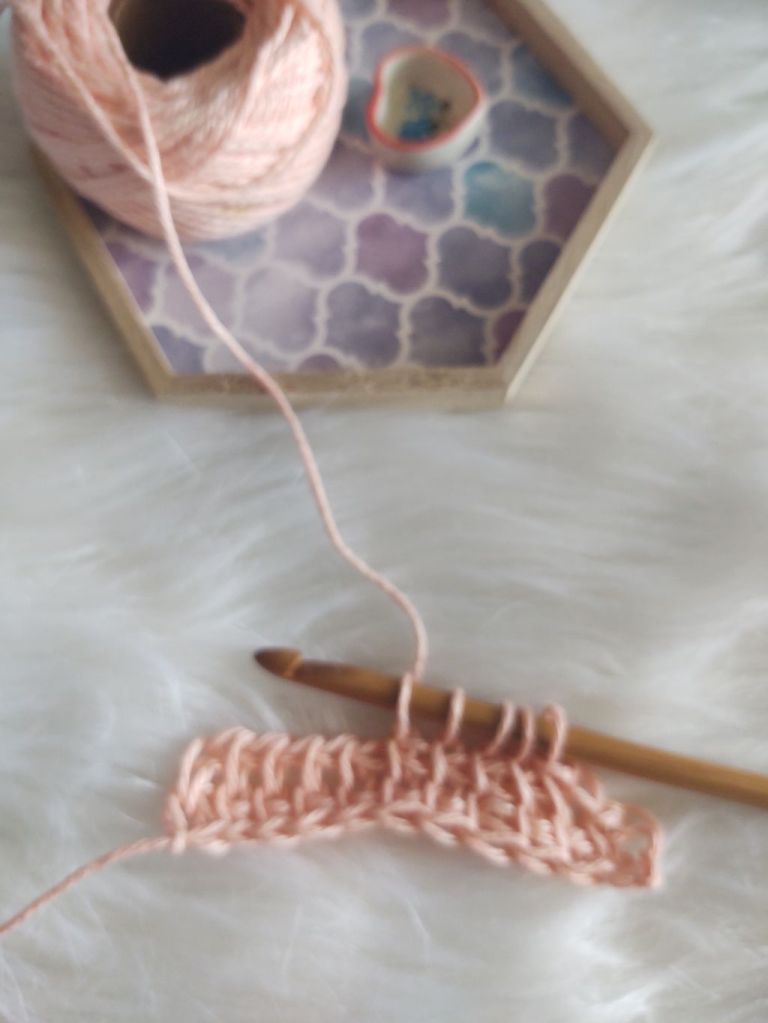
Picture shows row 3 in progress
Row 4
FP: Bind off 1 st as follows:- insert hook in the second vertical bar, yo, pull through the vertical bar and the loop on the hook, 1 TSS in each of the next 8 sts, 1 E st- 9 loops on hook.
Work RP – 9 TSS.
Row 5
FP: Bind off 1 st as follows:- insert hook in the second vertical bar, yo, pull through the vertical bar and the loop on the hook, 1 TSS in each of the next 7sts, 1 E st- 8 loops on hook.
Work RP – 8 TSS.
Row 6
FP: Bind off 1 st as follows:- insert hook in the second vertical bar, yo, pull through the vertical bar and the loop on the hook, 1 TSS in each of the next 6sts, 1 E st- 7 loops on hook.
Work RP – 7 TSS.
Row 7
FP: Bind off 1 st as follows:- insert hook in the second vertical bar, yo, pull through the vertical bar and the loop on the hook, 1 TSS in each of the next 5sts, 1 E st- 6 loops on hook.
Work RP – 6 TSS.
Row 8
FP: Bind off 1 st as follows:- insert hook in the second vertical bar, yo, pull through the vertical bar and the loop on the hook, 1 TSS in each of the next 4sts, 1 E st- 5 loops on hook.
Work RP – 5 TSS.
Row 9
FP: Bind off 1 st as follows:- insert hook in the second vertical bar, yo, pull through the vertical bar and the loop on the hook, 1 TSS in each of the next 3sts, 1 E st- 4 loops on hook.
Work RP – 4 TSS.
Row 10
FP: Bind off 1 st as follows:- insert hook in the second vertical bar, yo, pull through the vertical bar and the loop on the hook, 1 TSS in each of the next 2sts, 1 E st- 3loops on hook.
Work RP – 3 TSS.
Row 11
FP: Bind off 1 st as follows:- insert hook in the second vertical bar, yo, pull through the vertical bar and the loop on the hook, 1 E st- 2 loops on hook.
Work RP – 2 TSS.
Row 12
Insert hook into the E st, yo, pull through Est and loop on hook.
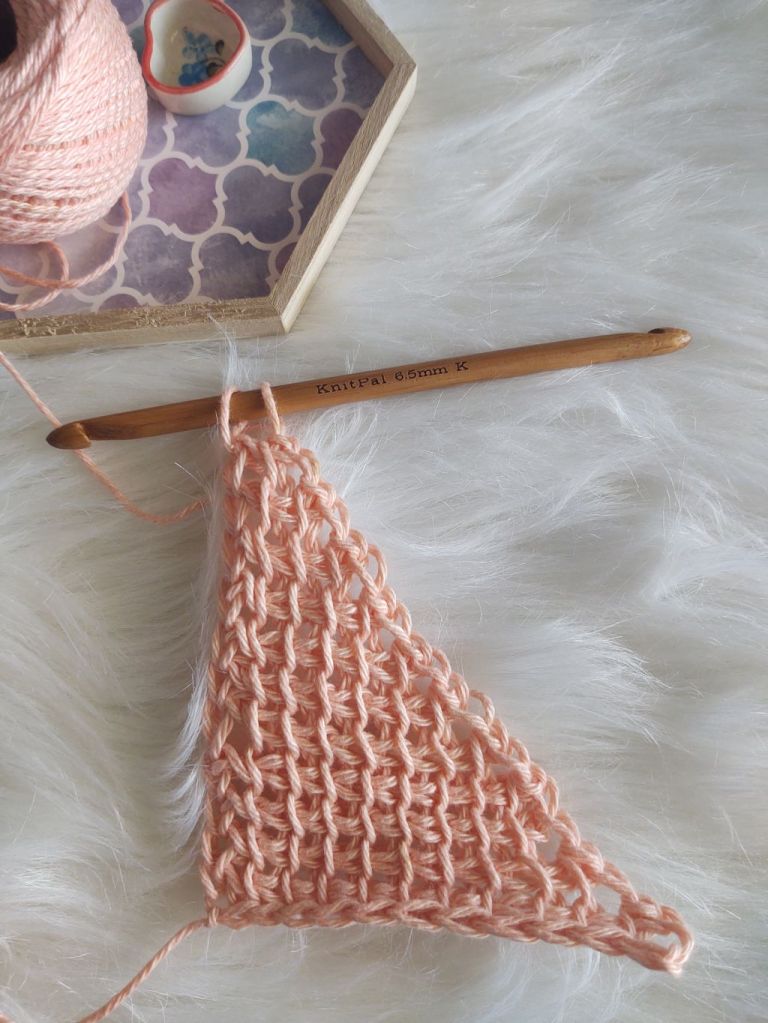
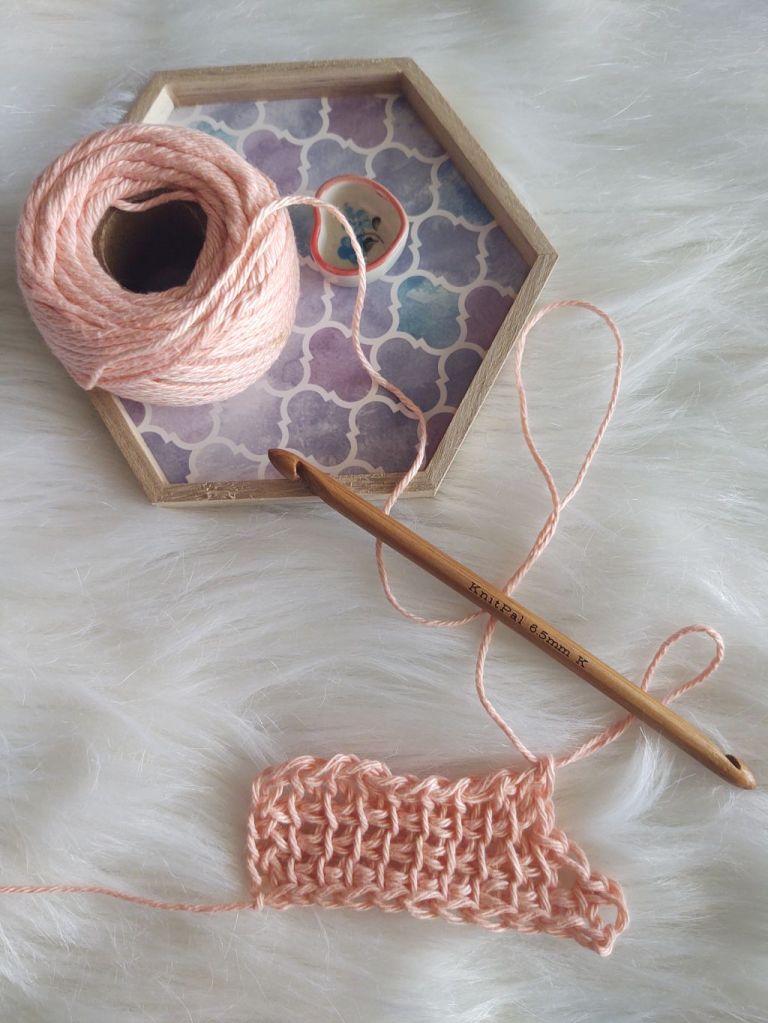
First quarter completed.
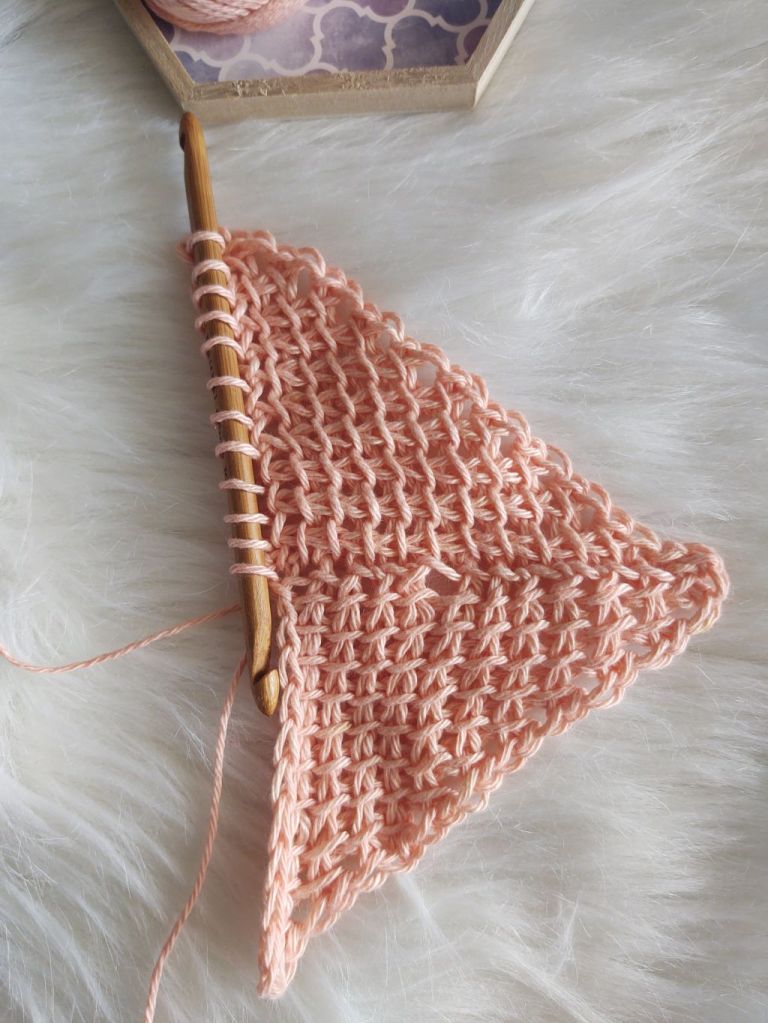
Second Quarter
You will be working along the Edge st side,
Row 1
FP: Pick up 12 loops starting from the second E st from the hook – 12 loops on the hook.
Work RP – 12 TSS.
Row 2 – Row 12 : repeat rows 2- 12 of First Quarter.
Repeat Second Quarter one more time.
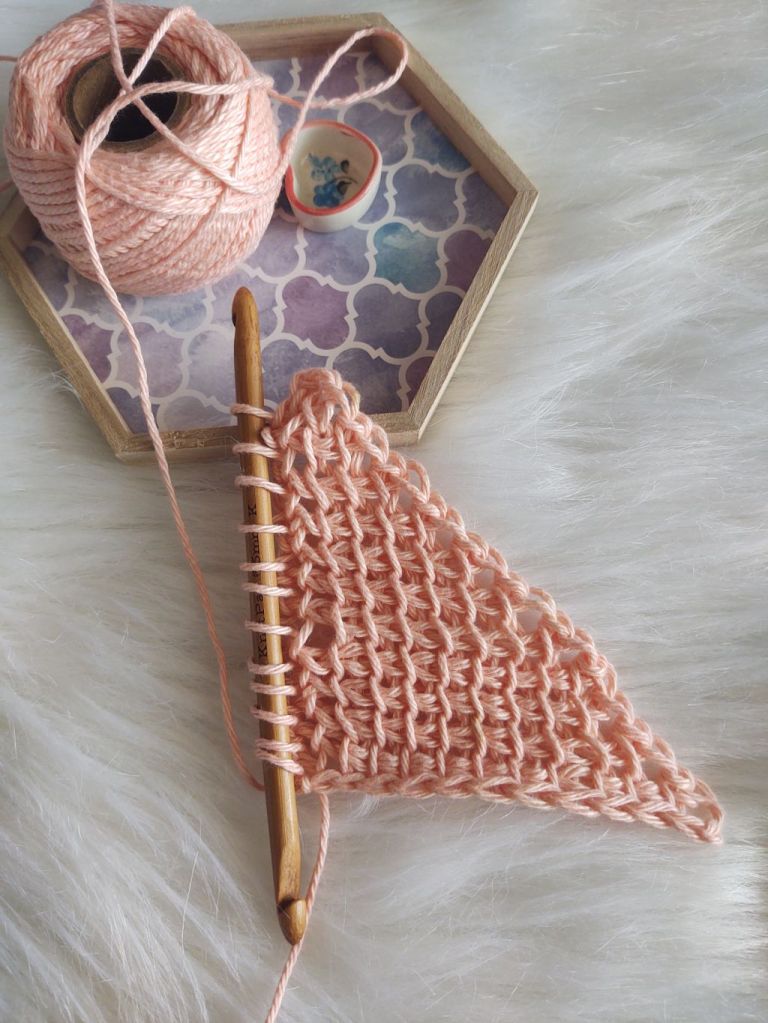
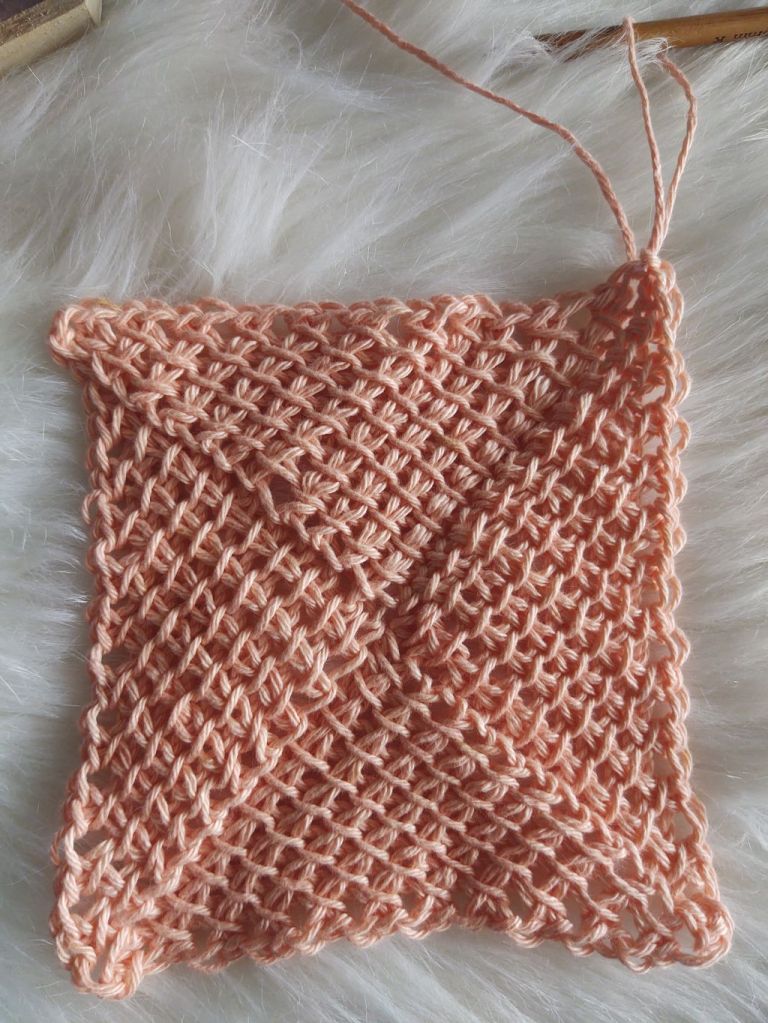
Start of third Quarter Pic
Last Quarter
At the end of each row in this quarter we will be joining to the starting chain of the first quarter. Hence there will be no E st in this quarter
Row 1
FP: Pick up 12 loops starting from the second E st from the hook – 12 loops on the hook.
RP : insert hook in the first chain of the first quarter , yo pull through that chain and the last loop on the hook, (yo , pull through 2 loops on the hook) repeat until only one loop is left on the hook.

Row 2
FP : Bind off 1 st as follows:- insert hook in the second vertical bar, yo, pull through the vertical bar and the loop on the hook, 1 TSS in each of the next 10 sts, 1 E st- 11 loops on hook.
RP : insert hook in the next chain of the first quarter , yo pull through that chain and the last loop on the hook, (yo , pull through 2 loops on the hook) repeat until only one loop is left on the hook.
Rows 3- 12 : Repeat Row 2 , decreasing one stitch at the beginning of each row in the FP , and using the RP to attach the last quarter to the first quarter.
Edging (you will be working around the coaster along the bound off edge of each side)
Round 1: Ch1, sc in same st, 1 sc in each of the next 21 sts, [(sc, ch2, sc)in the corner st, 1 sc in each of the next 21 sts,] 3 times, (sc,ch2, sc)in the last corner. Join with sl st to the first sc.
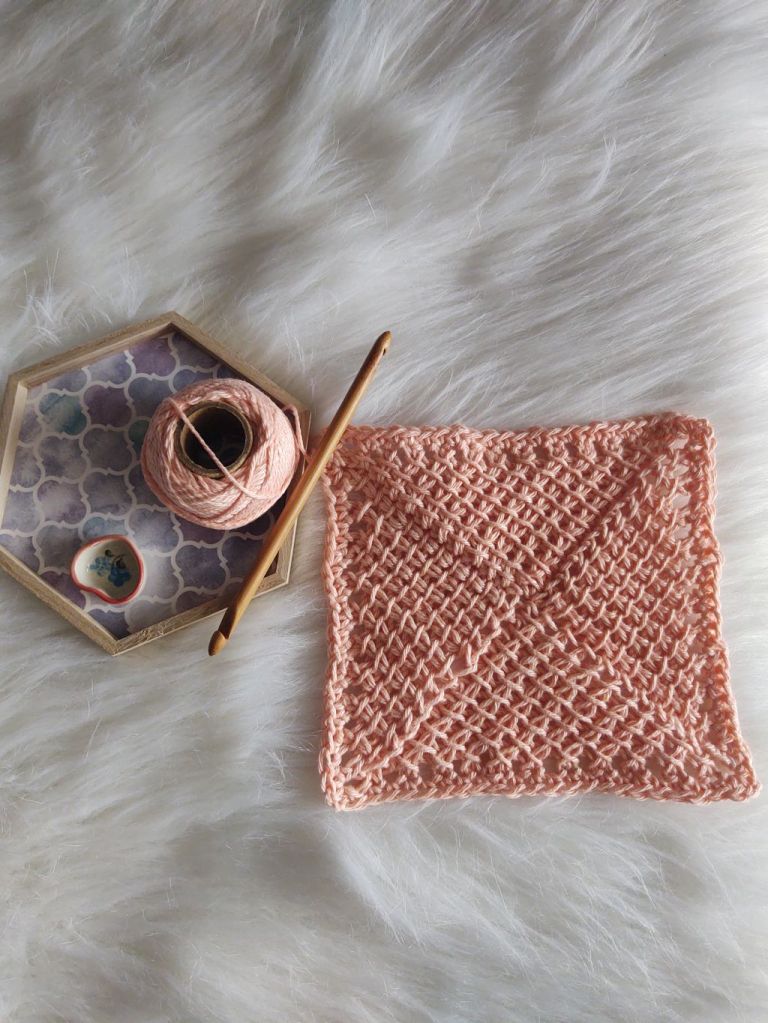
Fasten Off! Weave in the ends and give yourself a pat on the back for creating a beautiful square! I used Laura Knitting Cotton and 6.5mm hook and my finished square measures 6″ before blocking!

Ideas on how we can use this technique and make our own projects!
1: Start with longer chain and stop with two quarters. Add ties and you have made yourself a headscarf!
2: Using a longer Tunisian hook or Tunisian hook with cable , increase the starting square to more than 20 and you can finish a cushion cover front, or even a baby blanket.
3: Having more starting chain and longer Tunisian hook , stop with 2 quarters and make yourself a shawl!
4: Finish two squares , join them and use as hot mat!
5: Use Anchor knitting cotton and 4 mm hook and get a coaster!
The possibilities are endless! I would love to see what you come up with using this square, so do tag me @vimalavignesh on FB or IG !
Would also love to hear what you think of learning some new stitches using this square technique! Drop me a comment or email me vimala@vivacrochet.com!


Leave a comment